We’ve been doing a lot of remodeling work in our kitchen recently.
Removing wallpaper and installing beadboard paneling were the first two steps to updating the kitchen. Now we are painting and caulking. I have decided that wood putty is best suited for filling nail holes and acrylic latex caulk is great at filling in large gaps in trim-work and everywhere that the beadboard paneling doesn’t quite meet up with door and window frames.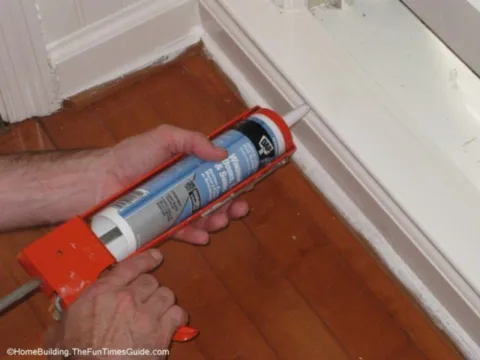
Acrylic latex caulk is super easy to work with. Why? Because you have plenty of time to work with it and it makes amateur goofs look like a professional did the work. I love that aspect of it. Acrylic latex caulk is cheap, too!
This caulk can be used on windows, doors, trim and siding. I’ve been using DAP ALEX Plus acrylic latex caulk plus silicone in the kitchen to fill all of the small gaps between trim pieces after putting up the beadboard paneling and all of the trim. It’s paintable, easy to clean up with water and it is mold and mildew resistant when cured. It’s also interior and exterior grade so it’s probably the most versatile caulk you’re going to find. Using DAP’s acrylic latex caulk is very basic but you may need to use it a few times to get the hang of it.
There are a few basic things that you need to keep in mind when using it:
- There are instructions to follow on the tube.
- There is a method of applying the caulk that is not found on the tube.
Using Acrylic Latex Caulk
I’ll give you a combination of how-to instructions on applying caulk:
- Only use white caulk if you plan on painting over it or if you don’t mind the white showing against your paint color. Otherwise, you might want to consider using clear caulk.
- Make sure your surface is clean and dry before you start.
- Cut the tip of the nozzle at a 45-degree angle. Pay special attention to how far down the nozzle you cut because the further down you cut, the wider the bead of caulk that will come out of the tube. I usually start with a small bead and if it’s not large enough, I cut it again. You can always make the hole bigger but not smaller.
- Have a small bowl of water and towel or paper towels at the ready. The bowl of water is for dipping you finger into to help smooth the bead out into the cracks and you know what to do with the paper towels.
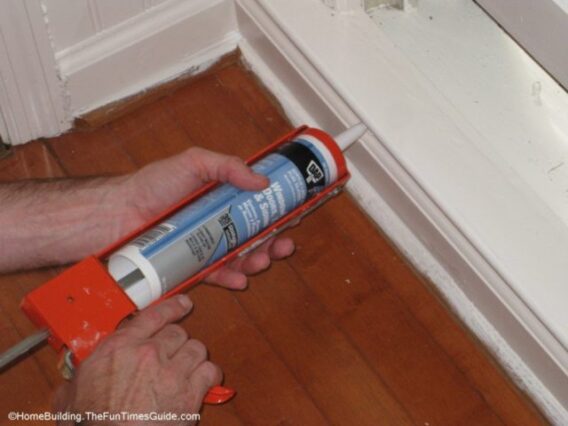
- Load it into your caulking gun and give it a slight squeeze on a spare piece of cardboard to get the hang of it. You need to remember to release the pressure the instant you are through running a bead. Otherwise, it will keep coming out of the end of the nozzle. Release the pressure by pressing on the thumb lever. You can see the button on my caulk gun in the photo at the top of this article. It’s as simple as that.
- The trick to caulking like a pro is trigger pressure and the speed at which you move the caulk gun along the line you’re filling. What do I mean by that? I give the trigger a steady pressure and move the caulk gun along depending on how much gap there is to fill. Minuscule gap… speed right through. 1/8″ gap… give it a little more time to fill.
- The other thing to remember about moving the caulk gun along is to push the tip into the gap at a 45 degree angle (to match the tip of the nozzle) and move it forward rather than dragging the tip through the gap. Pushing the caulk into the gaps is the idea. You’ll find that if you were to drag the tip of the nozzle along, it wouldn’t necessarily fill the gap and it would probably “peel” away in a little squiggle line. That means more work for you and more clean up. Trust me…I know.
- Once you’ve run a bead of caulk a few feet, dip your finger in the water bowl and press the caulk into the gap in one long, smooth motion. If you have excess caulk building up on your finger, stop and wipe it off on your towel or (if you’re frugal like me) push it into a small gap elsewhere and smooth it out shortly after you’ve completed smoothing the line you are currently working on.
- Don’t caulk the whole room and then go back and smooth it out. The caulk will dry where it’s thin and then you will have to scrape it off. That’s work easily avoided.
- I generally use my index finger for smoothing but I will often use my smallest finger for hard to reach gaps and small beads. I’m a mess when I’m done but it cleans up in just a minute with soap and water.
- Clean up any excess with a damp sponge and let it cure for about 2-4 hours before painting over it.
Now you’re a caulking pro, right? Don’t get caulky!
I started as a home-stalker… visiting brand new homes under construction in the neighborhoods near my house. That inspired me to write about home building and home renovation projects — chronicling homes during different phases of construction from a consumer's point-of-view. Basically, the tips you'll find in my articles are a collection of checklists for what I think should (and should not) go into building or remodeling a quality home.
