 Replacing a toilet is more intimidating than difficult. The trip to your local home improvement store to buy a new toilet may take longer than the time required to replace it. With a few basic tools, a new wax seal, silicone caulk and a new toilet you can have this job done in about an hour.
Step-By-Step Instructions for Replacing a Toilet
When replacing the toilet you must check the off set to make sure that it is less than or equal to the off set of the old toilet.
Note: The off set is the measurement between the wall behind the toilet and the bolts that hold down the toilet bowl.
Also check the measurements of any nearby obstructions that could restrict the size of your replacement.
Before you attempt to replace the toilet, be sure to turn off the water at the shut off valve on the supply line. Then flush the toilet several times until the tank is empty. Empty the bowl using a cup and bucket and later a sponge to remove as much water as possible.
How To Remove the Old Toilet
Disconnect the supply line from the toilet using an adjustable wrench. Also remove the bolts that are holding the tank onto the bowl. Remove the toilet tank and discard it. Remove the nuts on the bolts that are holding the bowl into place. Then rock the bowl slightly to break the wax seal and remove that as well. Take a rag and place it into the exposed pipe to prevent sewer gasses from escaping into your bathroom.
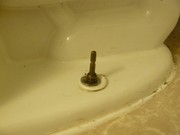
Take this time to carefully clean the space. Remove any bits of the wax seal that were left with a putty knife and clean the surrounding floor and wall as needed. Remove the bolts in the flange as well.
![]() Many homeowners take this opportunity to paint or wallpaper their bathroom.
Many homeowners take this opportunity to paint or wallpaper their bathroom.
Now You’re Ready to Install the New Toilet
When the area is clean you can now replace the toilet. Start by putting a new set of bolts into the slots on either side of the flange. Place the wax ring over the flange and remove the rag from the drain hole. Then place the new bowl over the flange, rocking slightly to make sure that there is a good seal. Place nuts over the bolt to hold the bowl into place.
Now place the new tank onto the new bowl. Use the gasket provided to create a watertight seal between the two. Use the bolts provided by the manufacturer to attach the tank to the bowl. Do not over tighten the bolts, but be sure that there is a good seal.
Check Your Work For Leaks
Finish by attaching the new toilet seat and the water supply line. Carefully check for leaks around the tank and flange by flushing the toilet. Any leaks you find should be able to be fixed if you tighten the bolts around the area. When you are sure that the toilet is working properly, run a bead of caulk around the footprint of the appliance.
I have a lot of hands-on experience in the home construction industry, with a good deal of experience in sustainable building. I’m mostly interested in home restoration and home renovations.
