Do you know how to use a sanding sponge (or a sandpaper sponge)?
I’ve had quite a few projects around the house that required the use of a sanding sponge
I like using one for general purpose sanding on woodwork, trim, and drywall.
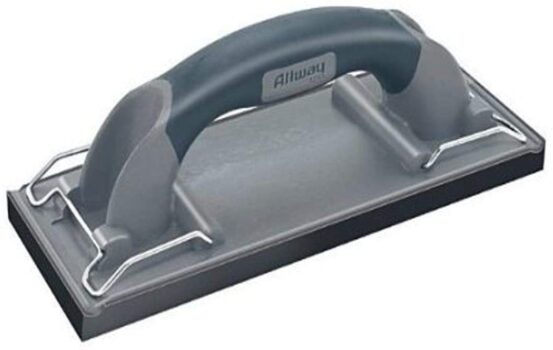
The (manual) alternative to a sandpaper sponge is to use a sanding block

I’ve got 3 different types of those, as well — and I use them for different purposes. But 9 times out of 10, I’m going to go with my sanding sponge for smaller jobs and trim work around the house.
I’ve got 2 different types of wall sanders:


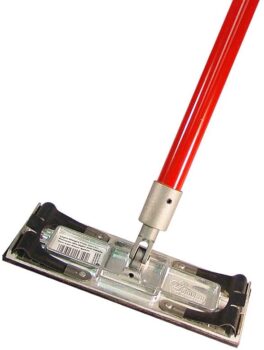
Both of those wall sanders give you the versatility of attaching sandpaper with whatever grit you desire.
Sanding sponges come in a variety of grits as well, but they’re much better for smaller tasks and trim work than wall sanders are!
A sandpaper sponge is one heck of a handy (yet simple!) tool to have in your weekend warrior arsenal.
I’m going to answer some of the questions you probably have about how to use a sanding sponge or sandpaper sponge…
What Is A Sanding Sponge?
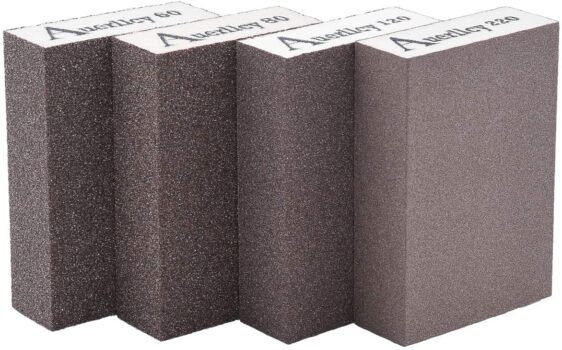
A sanding sponge is a foam block that has a roughness (or grit) to it on both sides and all edges. It usually has a medium grit on one side and a fine grit on the other, but dual grit sanding sponges can vary.
There are even dual angle sanding sponges — which makes getting into tiny nooks and crannies even easier. These are especially great for corners and ceilings.
TIP: Sandpaper sponges tend to last a long time, as long as you rinse them well and let them dry completely.
The sponge itself has the ability to conform to intricate curves and grooves as you’re sanding. That’s why it’s so handy when working with trim and moulding.
A sanding sponge can be used wet or dry — and if you rinse it out to remove the residue each time, you can reuse it many times. Wet sanding doesn’t scratch the wood as much as dry sanding, if that happens to be a concern.
Follow these steps to clean a sanding sponge.
Reasons To Use A Sandpaper Sponge
 is useful for many household DIY projects. It comes in different grits. Photo by Randy at TheFunTimesGuide.com")
There are several reasons to choose a sanding sponge instead of a sanding block or regular sandpaper for typical (and not so typical) DIY projects.
Here are some benefits of using a sandpaper sponge:
- When used wet, it provides dust-less sanding.
- It won’t develop bare spots or tear — like sandpaper does.
- You can rinse it and reuse it dozens of times — so it lasts a lot longer.
- The sponge conforms to irregular surfaces — for smooth, even sanding in difficult areas.
Sandpaper sponges typically come in 100 grit, 150 grit, and 220 grit. There are also dual grit sanding sponges and dual angle sanding sponges. So you can bet there’s one to suit any project that you come across!
Here are a few more reasons to use a sandpaper sponge.
How To Use A Sanding Sponge
As with any sanding project, you should begin with a coarser grit and work your way down to a finer grit.
Sanding sponges are particularly good for getting into the crevices associated with fine trim and crown molding. You can apply extra pressure to make the sponge conform to the irregular surfaces.
If you’re working with wood, be sure to sand in the direction of the grain as this video suggests:
TIP: If you’re working with wood, be sure to wipe the surface with a tack cloth  to remove any existing dust residue.
When working with drywall or spackling repairs, it’s really nice to have 2 sanding sponges on hand — one for wet sanding and one for dry sanding. Removing the initial residue or spackling is best accomplished with a damp sanding sponge. Then, once you’ve removed the majority of the material, move to your dry sanding sponge and use a light hand.
TIP: In both of those instances, simply rinse the sandpaper sponge, squeeze out the excess water, and let it dry for use on your next project. (You can’t do that with typical sandpaper!)
The bottom line: a sandpaper sponge is a gem of a tool for sanding wood, paint, metal, and drywall.
TIP: If you’re sanding bare metal, you can use WD-40 for lubrication instead of water.
Good luck with your project!


