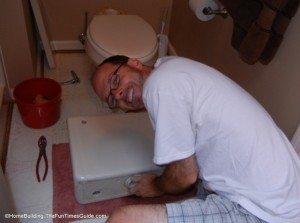
 I went to war recently in an effort to retrofit my 23-year-old toilet with a new, dual flush conversion kit.
The toilet won a few battles along the way, but I won the war. And that is what is most important!
It all started with a broken flush handle…
Choosing A Dual Flush Conversion Kit
I took a look inside the lid to replace the handle assembly and decided that it was time to replace the works with an entirely new set of guts for this old toilet.
I actually do this DIY stuff myself most of the time that I write about. By default, I will end up giving a little bit of inside information to the problems and exceptions that may have occurred along the way during my DIY project, and this particular project was no exception to that rule.
I made a trip to the Home Depot to get a total toilet repair kit and saw a HydroRight Dual Flush Conversion Kit. A dual flush toilet will save thousands of gallons of water for the typical homeowner over the course of a year.
According to their water-saver calculator, we will save approximately 5,800 gallons of water from this one toilet conversion. That comes out to $76 per year that would have been wasted due to flushing 3.5 gallons (toilets made prior to 1994) every single time, rather than choosing the single flush option 4 out of the typical 5 times in any given day.
I figured the wise move was to spend a couple of extra bucks to get the conversion kit and save much more money than buying a toilet repair kit that doesn’t have the dual flush option.
The kit I purchased was the HydroRight Total Toilet Repair Kit With Dual Flush Converter. The package info touts a quick, painless conversion (or replacement) and no tools are necessary. It also mentions that a Mansfield toilet will need to have a standard flush valve installed in order for the kit to work. Guess what kind of toilet I have? You guessed it… a Mansfield, of course!
I grabbed a standard flush valve kit, as well. Now I’m in for a total bill of around $33 for both kits. I can still save much more than that with the lower water bills that I will have, so I’m still on board with the project. Remember, all I originally needed was a new handle.
How To Install A Standard Flush Valve
With both kits in hand and the weekend upon me, it was time to get started.
Here’s how I converted my standard 2-piece, water hog, Mansfield toilet into a smarter toilet:
- Thoroughly clean the toilet and area surrounding it.
- Turn off the water to the toilet. There is a valve just below the tank behind the toilet on the wall (yours may be on the floor).
- Flush the toilet and grab a big sponge and bucket and start removing the remainder of the water in the tank. Believe me… you want it to be bone dry inside. Otherwise, you’ll have yourself a wet floor in a few minutes. This all assumes that you have a 2-piece toilet. If you have a 1-piece toilet, I do not have experience with one of that type.
- Disconnect the water from the fill valve. It’s on the underside of the tank. Sop up any water that hits the floor. You’ll want to have a dry floor before you reconnect the water and seat the tank back onto the bowl. It’s easier to spot leaks that way.
- Reach under the toilet and remove the nuts that secure the tank to the bowl. It’s easier if you have a (deep) socket wrench and the biggest, longest flat-head screwdriver that you have in your possession to hold the bolt still while you ratchet the nut loose.
- Lay a nice, soft towel down on the floor in front of the toilet. It will keep your floor from getting scratched and soak up any residual water that spills out.
- Remove the tank and lay it on the floor over the towel. You can lay it on its back or side — whichever is easiest for you to work with.
- Remove the black, rubber sponge gasket from the bottom of the tank and toss it. There should be a new one in the box of the new flush valve that you just bought.
- Unscrew the big plastic nut from the old flush valve (the underside of the tank). You might be able to turn it by hand. But if not, you can place your screwdriver on the leading edge of the angle and lightly tap it (counter-clockwise) with your hand or a hammer. It should loosen it up for you to remove it by hand the rest of the way.
- Pull the old flush valve out from the center of the tank and toss it in the trash. You’re getting all new parts, and you don’t want to mix old parts with new.
- Follow the installation instructions that came with your new standard flush valve. Hand tighten the big nut onto the new flush valve, but make it nice and snug.
- Position the new flush valve so that the overflow tube is positioned at approximately 10 o’clock or 2 o’clock, depending on which side of the tank the handle is located on.
How To Replace Your Old Flush Kit With A New Dual Flush Conversion Kit
The following describes a complete toilet conversion kit, which also includes replacing the old fill valve with a new one that comes with the complete kit that I purchased.
First, replace the old fill valve with the new one:
- Unscrew the plastic nut from the bottom of the fill valve that is located on the underside of the tank.
- Remove the old fill valve and trash it.
- Follow the installation instructions to the letter for the new fill valve. It’s pretty simple really and practically every time that I’ve replaced one it rarely leaks from this area.
- You’ll also want to adjust the valve height so that the top of valve is even with the top of the tank.
- Slide the J-tube outward (it operates like a trombone) so that the 90-degree angle of the tube is at the back corner of the tank.
- There’s also a thumbscrew adjustment for the float to raise or lower the water line inside the tank.
The fill valve made by HydroRight has a nifty “smart” nut. When you hear it click once or twice (like a gas cap on a car), stop tightening. This prevents over-tightening — which is a bad thing in the plumbing world when rubber gaskets and washers are involved.
Place the tank back onto the bowl using all new hardware and washers. Pay attention to the different types of washers. There are 3 with this kit. There are rubber washers that have cloth sandwiched in-between 2 layers. They slide over the bolts on the inside of the tank. The regular rubber washers go on the underside of the tank (secured by brass nuts) and the metal washers go on the underside of the bottom part of the toilet and are secured with a wing nut. That is critical to a no-leak tank.
Grab your level and tighten the different wing nuts accordingly to make it snug and level. DO NOT OVER-TIGHTEN!
If you have a solid metal water supply tube, you might want to consider replacing it with a braided, flexible tube. A solid supply tube is often the source of the leak, if you have one. If you do replace it, you may need to turn off the water to your house and turn on a couple of faucets to run all the water out of the plumbing.
That’s what I had to do because even though the supply valve was turned off, water was still coming out. Hence the reason to turn off the water to the house and make a quick trip to the store for a new, flexible water supply line.
Once the water has stopped running you can safely remove the water supply tube. There might be some residual water but don’t that let alarm you. Just have your sponge and bucket handy.
Now that you have the new flush valve and fill valve installed, you’ll need to get a ruler. The top of the overflow tube MUST be at least 1 inch below the critical line (CL tab). That is standard code. Your installation instructions will show you what it looks like and where it is located.
My overflow tube was too high so I took an old steak knife and used it like a tiny saw to remove the excess height of the overflow tube (about 1½”). It took less than a minute to saw through it.
Connect the rubber tube to the fill port on the fill valve and clip it onto the overflow tube so that the water flows inside of the tube… not outside of it.
Install the flush button per the instructions.
How To Install The Dual Flush Converter
This is the easiest part of the whole conversion.
You can follow the instructions just as easily as I can write them, so I’ll just tell you that I had the converter installed and I turned the water on. It would only go about halfway up the tank and water was still running.
I looked at it closely and couldn’t see anything obvious, but I could feel a gap down around the blue gasket.
I took the upper housing of the converter back off of the base (per the troubleshooting instructions) and looked down inside. I could easily see that the blue silicone gasket was not seated properly into the flush valve. I re-seated it and tried again. Success!
Finally, I made my flush adjustments and water height adjustments.
All in all, this would have been an easy conversion had it not been for a couple of problems:
- I accidentally used the old rubber sponge gasket rather than the new one. The result was a poor fit and a bad leak when I installed the tank and ran the water back into the tank. Initially, the tank didn’t level very easily either. I worked way too hard to get that right and it still leaked — all because I didn’t throw away the old gasket to get it out of my sight.
- Replacing the water supply tube was critical to having no leaks. I think the old metal tube was being stretched upward — which, in turn, caused the valve not to work properly. This led to shutting down the house water.
All in all, I’m glad I made the conversion because I know it will help conserve water and keep some green in my wallet.


