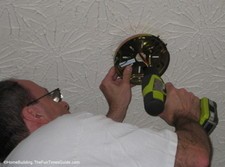
 If you’ve got an old, wobbly ceiling fan that you want to replace, you can install a ceiling fan yourself with a little bit of patience and know-how.
Even if your fan works just fine but you want to update to a ceiling fan that is more in line with your current decor, has more features, has a higher efficiency rating or a higher cubic feet per minute (CFM) rating, you can follow along for a few helpful DIY hints.
Up until recently I had never had to replace a ceiling fan and you can bet your bottom dollar that I learned a few important tips that weren’t included with the instructions in order to get the darn thing installed. There are too many real world variables for the manufacturer to cover every situation that may come along. But I now know that I wouldn’t have any trouble at all installing a ceiling fan when the time comes to do it again.
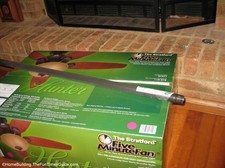
The ceiling fan we bought "bragged" that it was the "Five Minute Fan" on the outside of the box. Ha! They even put a trademark on that particular marketing slogan. I’m here to tell you that it took a tad longer than 5 minutes to install it. Tack a couple more hours onto that five minutes and it’s a lot more believable. No worries, though. It’s another project marked off my list.
When we were shopping for a new ceiling fan to replace the Hunter fan that was installed over 20 years ago, we went with another Hunter ceiling fan.
Why did we stick with a Hunter ceiling fan?
Because our old Hunter ceiling fan never gave us one problem over the life of the fan until it finally stripped a gear that rotates the blades.
The motor still works just fine but it’s not connected to the blades anymore. There are other brands on the market that are reliable, as well, but I like to stick with what I know is a quality product.
This is not a paid endorsement… I happen to like the Hunter brand and have 4 of them that work well.
I gave consideration to locating a part to repair it but the fan we had looked dated with its’ bright brass body and parts.
I’m not going to get into the step-by-step installation instructions here because there are so many different types of ceiling fans on the market and everyone’s installation situation is unique. I’ll give a few helpful hints that worked for me or that I had to learn the hard way.
Feel free to learn from my mistakes. Just know that I corrected any mistakes I may have made along the way and that it’s cool and breezy in my home right now.
What To Look For When Buying a Ceiling Fan
Personal preferences should be tops on your list. If it doesn’t look good, why would you want to bring it home? Consider these features:
- Finish
- Style of Blades
- Light Kit
Choose the right size. You should consider the size of the room that the fan will be installed in:
- Up to 75 sq. ft : 29" – 36"
- 76 – 144 sq. ft : 36" – 42"
- 145 – 225 sq. ft : 44"
- 225 – 400 sq. ft : 50" – 54"
- Do you have a huge room to cool? You need a Big Ass Fan. I’m not kidding!
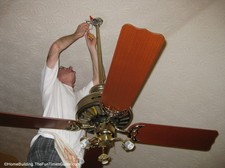
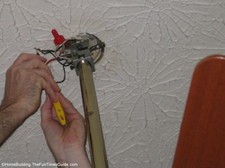
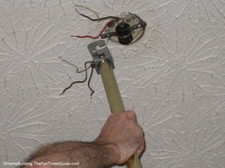
Choose the correct type of ceiling mount.
Ceiling fans should be at least 7 feet above the floor (floor to blades) and at least 18" from all walls. If you’ve got high ceilings, the optimal height is 8′ – 9′ above the floor for best air flow. I have a vaulted ceiling so I removed the standard 3" downrod that came with the fan and installed a 36" downrod (with matching finish) that I purchased separately. This put the height of my fan at about 8′ 6". You should choose between:
- Flush mount for low ceilings
- Standard mount (3" – 5" downrod that comes with most fans)
- Extended mount downrods for high ceilings
- Sloped mounts for mounting a ceiling fan on angled ceilings such as vaulted and cathedral ceilings
Exterior or bathroom placement a factor?
Are you installing a ceiling fan in a bathroom or other humid interior location? Purchase a ceiling fan that is UL listed with a damp rating. If you’re installing a fan outside on your porch or tiki bar, buy a UL listed fan with the "wet" rating.
Here is a good explanation of damp rating and wet rating.
I once saw a neighbor’s ceiling fan that was installed in an open, but covered area of his shed and the blades were all drooped over like big, floppy bunny ears. Not a pretty sight. Buy the right type of fan for the location that you will install it in.
Airflow is an obvious consideration for ceiling fans.
Look at the all-important CFM ratings. The higher the better. But don’t just consider airflow. Think about how much energy the fan will use to produce the desired CFM. The minimum required CFM for Energy Star rated ceiling fans on high speed is 5,000 CFM and an efficiency of 75 CFM/Watt. On low speed, the minimum airflow is 1250 CFM with an efficiency of 155 CFM/Watt.
More on Energy Star rated ceiling fan requirements. Here for Energy Star ceiling fan light kit requirements.
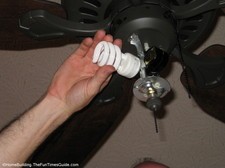

My fan happened to meet these requirements and it also came with 2 – 14 watt CFL light bulbs. That should save me $60 over the life of the bulbs because they use 75% less energy than incandescent bulbs and last 10X longer.
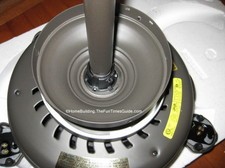

 Things to keep in mind when installing your ceiling fan:
- Check off all of the parts on the part list and read the installation instructions all the way through before beginning. It’s handy to know that you have everything, what it looks like and when and where to put it to use. While you’re at it, check out all of the illustrations. I sometimes find that they will show how parts look after they are installed and from different angles.
- Turn off the power at the breaker box and the light switch in the room.
- If you’re removing an old ceiling fan, take note, better yet… take a couple of photos of the wiring and anything else that you will need to put back together before you disconnect it. I do this all of the time for all sorts of projects.
- It’s handy to have a helper to get you out of a jam or when you need a spare hand.
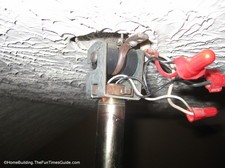
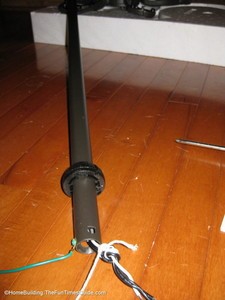
- If you’re installing an extended downrod and having trouble fishing the wires through it, twist the wires together on the end and tie a knot. Get some string and tie it to the knot. Hold the downrod vertically and drop it through. Then simply pull the wires through. (see photo on right)
- If you get frustrated, as I did at one point, take a break. All I could think of was the printing on the box that read "The Five Minute Fan". That’s not usually how it goes with weekend warriors like you and I, I’m betting. Having a few minutes to simmer down and figure out how to make it work is half the fun of DIY… right??!! No… that’s not the fun part. The fun part is making it work and standing back to take a look at your completed project.
- Use your ingenuity when something goes wrong. For instance, the instructions for my fan stated that I should use a 9/64" drill bit to drill pilot holes to screw in the 3" wood screws directly into a wood stud to install the bracket on. I did that but the screw heads stripped and I then tried to remove them. When they wouldn’t budge, I backed out the screws the hard way… with a pair of pliers. One of the 3" wood screws came out but the other one broke off at the stud. What now??!! This is where ingenuity (and a 5 minute break) comes in handy. There were a couple of threads for metal screws on both sides of the box so I used the screws from the old fan and used them to secure the fan bracket to the ceiling. Piece o’ cake.
Now go hang that ceiling fan that’s been sitting in the box in the garage for the past couple of months and mark that off your list.

