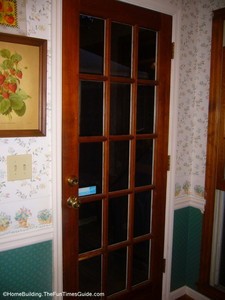
 We are in the process of yet another home building project. This time it has to do with remodeling our kitchen. There are going to be several steps that need to be taken over the next few months to get it the way we want it, but for now we’re doing some cosmetic work.
Some of the cosmetic work involves removing all of the wallpaper and moulding to make way for beadboard, a new chair rail and a fresh, new coat of paint. That’s right! Out with the old and in with the new. I’m going to show you how to remove wallpaper simply and economically. Not only that, it’s eco-friendly, too.
I posted an article showing the best way to remove wallpaper. In the article, I was in the middle of a bathroom redecorating project. The most difficult part of the job was removing the wallpaper because the builder did not bother to prime the walls prior to applying the wallpaper. It makes a BIG difference in how easy (or difficult) it is to remove… trust me. We used a paper tiger and wallpaper remover solution that worked on breaking down the glue. But this time, we’re going green.
The current kitchen redecorating / remodeling project is the seventh room in the house that we’ve had to remove wallpaper from, so I feel as though we know our way around the topic.
I know there are those of you that have heard of or used a steamer to remove wallpaper and had favorable results.
I’ve never used a steamer mainly because I don’t want to bother with making a trip to the store to rent one. It’s as simple as that.
We’re pretty excited about the whole kitchen remodel project because our kitchen has been in dire need of a facelift for a few years now. All of the decisions have already been made regarding colors, styles, materials, etc., so we feel comfortable starting out with having a new look on the walls.
If you aren’t comfortable using chemical solutions to help you remove old wallpaper, this post is for you. I can’t guarantee how easy or difficult it will be for your individual situation, due to:
- different grades of wallpaper
- how old the wallpaper is
- did the installer use a vinyl glue in addition to the glue on the wallpaper itself
- humidity level of the room that the wallpaper is in
- was the wall properly primed prior to installation
Those are all factors in how simple or difficult it is to remove wallpaper in any room. Keeping that in mind, this is how we removed the wallpaper from our kitchen walls using all-natural supplies.
We live in the deep south and humidity levels in the summer are consistently high, but I keep the humidity level at around 52% inside the house with the help of my HVAC system (HVAC link#2). That’s another post for another time.
How To Remove Wallpaper… The Eco-Friendly Way
So, here’s my not-so-big secret.
- First, strip off the top layer of the wallpaper.
- Grab your trusty putty knife and pick at a corner of the wallpaper to get it started. Strip it all off, baby! If you’re lucky, both layers will come off, but don’t count on it.
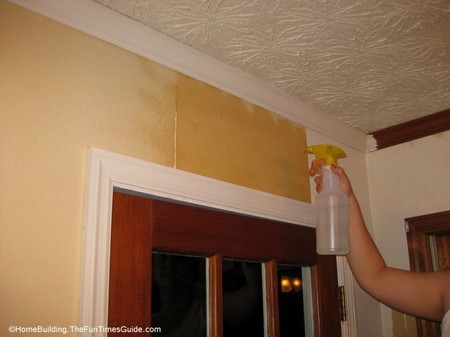
- Go back with a spray bottle (here comes the green, eco-friendly part) full of water… yep H20… and simply spray a 3′ x 3′ section, or whatever works best for you.
- Let it soak in for a minute, or two, and start picking and peeling away using your putty knife and fingers. It would be advantageous not to cut your nails until after you’ve finished removing the wallpaper.
It’s really that simple… not to mention cheap. You always have tiny bits and pieces that are pretty stubborn and don’t want to come off but you overcome them with persistence… and another shot of water.
Let it dry and come back to sand away some of those little bits and pieces. They’ll come right off most of the time and you won’t need to pick pick pick until the cows come home.
Good luck with your project!


