We recently finished painting our kids’ bathroom. We allowed our daughter to choose the paint color when she was 5 years old. Yes, I know … what were we thinking letting a 5-year old pick the paint color?!! How could we refuse such a cute little face. You understand what I’m talking about if you are a parent.
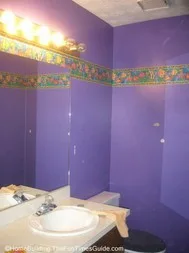
Well, time marches on and a change has been long overdue. When she chose the color, Barney was the most popular children’s television character at that time. That’s right…the secondary bathroom has been Barney purple all of these years with an aquatic themed wallpaper border and shower curtain/bath set just to make it interesting.
I can’t believe we left it purple for so long. It just kept getting pushed to the bottom of the job jar for so long that eventually the time would come to repaint the bathroom.
Times have changed since then and she’s grown out of Barney now that she’s almost 19 (snicker snicker). It was our turn to choose the paint color so we went with a nice, light beige. It’s a semi-gloss latex made by Valspar and the color is called Hopsack. Keep reading to see the color we chose.
What a difference a few coats of paint has made! It took a while to paint because of the intensity of the purple and the huge contrast the new color is from the old color, but it was well worth it.
These are the steps that we went through to make this bathroom much easier on the eyes:
- Removed all picture frames, light switch covers, shelves and anything else from the wall.
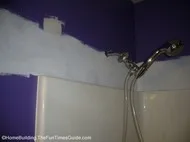
- Attempt to remove the wallpaper border only to discover that the vinyl wallpaper adhesive I used to make it adhere better to the wall caused it to be very difficult to remove cleanly.
- Discuss why the wallpaper border isn’t coming off clean and go to Lowe’s for a piece of advice to cover up the remnants of the adhesive.
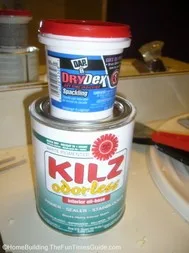
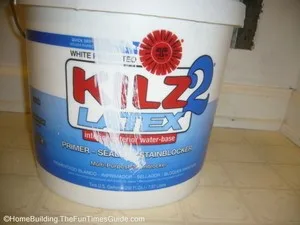
- Purchase a quart of oil-based primer that will stick to the leftover adhesive per the Lowe’s guy. Let the oli-based primer dry thoroughly and sanded it as smooth as possible. Regular primer was then painted over the oil-based primer to create a more uniform look.
- Remove the toilet tank to make it easier to paint.
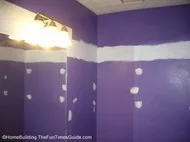
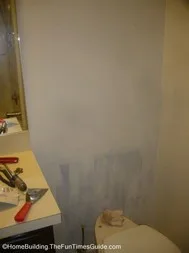
- Paint two coats of latex-based primer on all walls with a 3-4 coats of primer for areas bleeding through.
- Paint two coats of the semi-gloss latex top coat (Hopsack).
- Paint the trim the same color as the remainder of the house.
- Let dry for a couple of days (dependent upon the humidity level of your area).
- Replace all fixtures, shelves and picture frames.

We’ve done a couple of other things to the bathroom to bring it up to date such as:
- Replaced the outdated Hollywood-style six-lamp fixture with a more modern three-lamp satin-nickel finish light fixture.
- Built a custom-made frame to surround the mirror.
- Refinished the vanity cabinet with a rich cappucino paint color .
In the near future we plan to:
- Replace the linoleum with travertine tile,
- Upgrade the counter-top and sink.
- Replace the toilet with an eco-friendly toilet.
After all is said and done, this will be a great looking bathroom that we can be proud of. If you have a project to tackle with similar challenges, I hope you found this article helpful. Let me know how it turns out. Send in a photo, or two.


