Is that granite in the photo on the right? No. It’s not.

It’s our old laminate countertop after we used the Giani Granite paint kit on it. I never thought we would paint countertops in our bathroom, but we did. Why?
We wanted to paint countertops for 2 very good reasons:
- It would save us money. There are quality paint products and paint kits on the market today — including Countertop Transfauxmations — that can replicate an authentic granite countertop look at a fraction of the cost.
- Our old laminate countertop was dated. Just that… old and dated looking. We took the “nothing to lose with much to gain” mentality for this project. Our thinking: try a $50 granite paint kit to extend the life of the countertop versus paying $2,000+ for a real granite countertop. If we didn’t like it, we could either repaint it or replace it with the real deal.
We originally decided to paint the kitchen countertop with the Giani Granite paint kit, but later decided that it was in poor condition. Therefore, it would be replaced on a later date rather than painting it. That was the deciding factor that changed our minds to paint the bathroom countertop instead.
My wife headed up this project. She did all of the fun, artistic stuff (painting) and I did all of the prep and finish work (taping and caulking).
First, I’ll describe how the process worked. Then, I’ll talk about what was good and bad about the whole experience, plus a hiccup we encountered along the way.
How To Paint Countertops To Look Like Granite
#1 – Clean The Countertop


#2 – Tape Off The Area
Next, tape off the sink and everything else that is adjacent to the countertop.


- I used a tape made by Scotch 3M called Edge Lock painters tape. It doesn’t allow the paint to bleed under it. Works great!
- Gorilla Tape is another great product for the same purpose, but I haven’t used it yet. Here’s a review of Gorilla tape.
#3 – Start Painting
Now, begin painting the countertop:
- Line a paint tray with aluminum foil and pour some of the primer coat into the tray. Pour just a little at first and then add more to the tray as needed.
- Use the provided roller to apply the primer coat. Roll it on in small areas so the edges stay wet and blending is smooth.
- While it is still wet, backroll in long, even strokes to avoid lines.
- Let it dry for at least 8 hours.


Here is where one of the hiccups I mentioned earlier comes into play.
IMPORTANT: Apparently, there was a micro-thin layer of silicone caulk on the top of the backsplash that wasn’t visible to the naked eye. When the primer coat was applied, the wet paint retreated from the areas that the silicone was on. There was nothing we could do at this point, except to let it dry. Once dry, we scraped the silicone off with a razor and sanded the surface to give it a little grip. After we were satisfied that the silicone was removed from the areas that we wanted it to accept the paint, we repainted those areas and waited for it to dry.


#4 – Keep Applying The Paint
Okay, now continue painting the countertop:
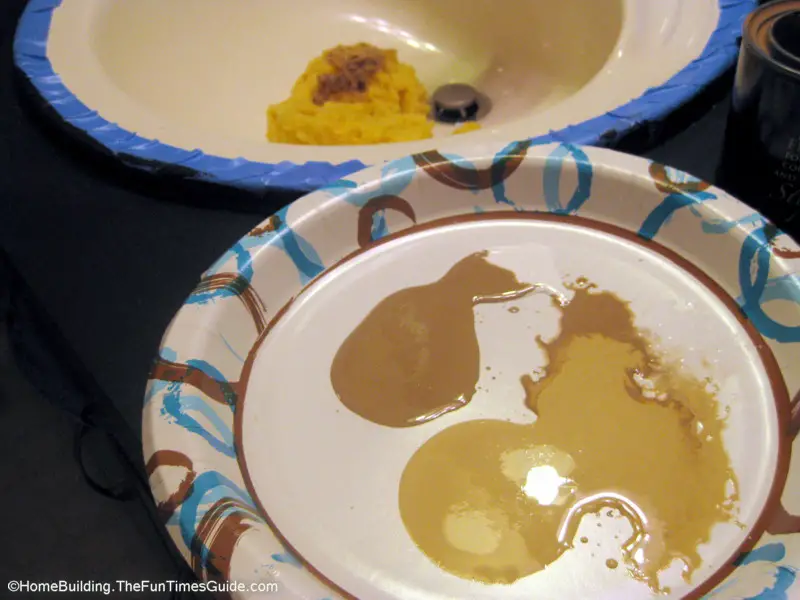
- Gather a few extra strength paper plates that you will pour small amounts of each individual mineral paint onto. You can pour 1 to 3 colors on the same plate at the same time, if you like. Or use a single plate for each color. We suggest using the same plate to get a good blend.
- There is a piece of black paper included in the kit for practice. Use it. This is a really helpful way to get a feel for the process, and it allows you to experiment with different looks. Do you prefer more black showing through, or less? You can mix your own colors for a custom look, or stick with the 3 that are provided. You get the idea. If you run out of room on the paper provided, grab a piece of black construction paper and keep practicing.
- Take the provided sponge and cut it in half. Set one half of the sponge aside, and then cut the other half in half again. We had some tight places, so it was helpful to have a couple of very small sponge pieces to work with. (You could even cut a small piece off of the smallest piece you have to make different patterns.) The directions with the kit instruct you to cut the sponge into 3 pieces, but don’t be afraid to cut them smaller than recommended to get into the tight spots. A small paint brush can be helpful, as well. We used one from a child’s watercolor kit and it worked great in those hard to reach areas.
- Dab the sponge in the darkest color (step 2) of the 3 colors provided. Tap it on a bare spot of the paper plate a couple of times to remove the excess and start sponging onto the counter in a small section.
IMPORTANT: Use a light, straight up and down motion to avoid smears.


- If you have any smears, or the paint globs on heavier than you would like, just tap lightly over the area (turn the sponge to a dry area if necessary) until the problem is corrected. This process is very forgiving, just tap, tap, tap and blend, blend, blend. Once a small area is covered with the darkest color, move on to the medium color (step 3). Tap directly over the darker color using the same up-and-down motion.
- After you’ve completed that color, move on to the lightest color (step 4). This is the highlight color. You probably won’t use much of this color. Use the same procedure: lightly tap a random pattern.
- When that area looks the way you want it to, move on to the next small section. You want the edges of the first section to still be wet, so the colors will blend. Keep working from section to section until the counter has the look you want.
- Be creative and experiment with your colors. You can even blend your dark and medium colors together if you want to create your own shades. If you don’t like how it looks, just start over with the dark color, then the medium, then a few touches of the light color until you have the look you want.
- If you get tired and want to call it a day, no problem. Just start again the next morning. The more color you add, the more depth your project has. You can even use the highlight color to draw veins in your “granite” if you’re feeling especially artistic.
#5 – Apply Top Coat Sealer
- You need to allow the paint to dry for 4 hours before applying the top coat. The top coat looks milky when wet, but dries clear.
- To apply the top coat, follow the same procedure as applying the primer. Roll onto a small section, backroll until it’s smooth with no lines, then move to the next section.
- Allow 4 hours drying time before applying the second coat of the top coat.
- All that is left is to allow the counter to cure for 72 hours before you set anything on it. (You can still use the bathroom, just don’t set anything down on the countertop.)


TIP: When removing the tape, be sure to score where the counter meets the tape before pulling so you don’t “tear” the paint off the counter before it has time to cure.
#6 – Caulk Around The Sink
- The last part of the process is to caulk around the sink and where your counter edges meet the wall and to fill in the gaps where “granite” meets “granite”.
- You can caulk 24 hours after you paint and remove the tape.
- I used clear caulk where granite meets granite and white caulk where granite meets the wall and around the sink. The white caulk also served the purpose of covering slight imperfections around the sink areas. Clever, eh?

That’s it! The instructions included with the kit are very detailed and there is even a DVD included, so you can see how it’s done before you get started.
TIP: We would highly recommend this product for a low budget upgrade to paint countertops.
Pros of Using Granite Paint
- Gianni granite paint kit gives countertops a modern look without the modern price tag.
- It is a fun and forgiving process.
Cons of Using Granite Paint
- This project ties up the bathroom for a couple of days.