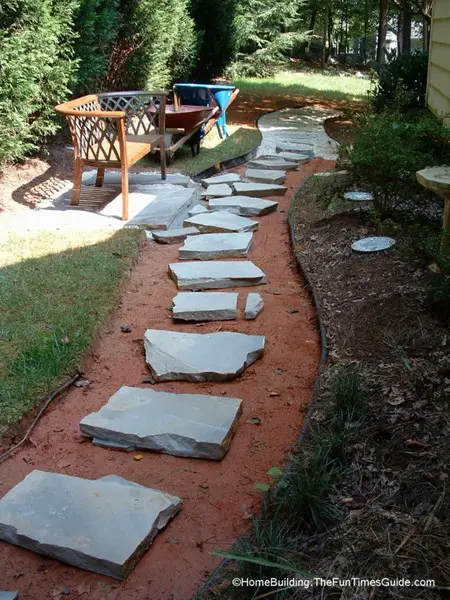
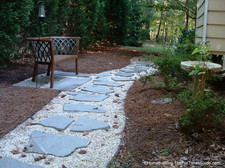
Quite a few years ago, I installed a stone walkway in my side yard. It was an ambitious project for me.
I had never attempted to build stone walkways before, but I wanted to create a small, sideyard oasis to sit on a bench and enjoy watching the birds & the bees going about their business.
I did some research and also talked to the folks at Earth Products to help me through the process.
I took their advice, combined that with our ideas, and made the natural stone walkway that we had envisioned.
I’ve learned a few things about building stone walkways since then, and thought I could share that knowledge to help you with your stone walkway project.
I knew that installing the stone walkway was going to be a pain in the bum to build for a couple of different reasons.
Here are 2 of them:
- It was August here in Georgia — which meant that working conditions were not optimal. That equates to heat, humidity, and mosquitoes.
- Rocks are heavy and I’m not, so it was going to be strenuous work. I needed to remind myself to use leverage (a handtruck and giant crow bar) at every opportunity when moving the rocks.
How To Determine All The Materials Needed
Materials:
- crushed stone
- granite gravel
- stepping stones of your choice
- edging (steel or plastic) and stakes
- water
- chalk spray
Tools:
- level
- wheelbarrow
- clawhammer
- 5 lb. sledgehammer
- water hose
- flathead shovel
- measuring tape
- gloves
There are several considerations to decide on before you begin.
- Take an old garden hose
and use it to outline the walkway.
- When you’re happy with the direction and flow, grab a can of eco-friendly landscape marking paint and make your mark of the outline for the walkway.
- You need to take into account if the pathway is meant for 2 people to walk side-by-side, or simply as a single-file access path. (My walkway was a single-file access path.)
A single-file walkway with crushed stone surrounding the stepping stones should be approximately 30″- 38″ wide. The width is really up to you, so make it as wide or narrow as you like. A side-by-side walkway will be a few inches wider.
To determine how much material you need for your walkway, do this:
- Decide on which type of stepping stones you want and how close together you want to place them.
- Use this calculator to estimate how much material you will need for your stone walkway project.
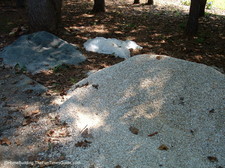
I purchased all of my materials and had them delivered. Most suppliers will offer delivery for a nominal fee. It’s worth the fee to avoid the trouble of hauling it yourself — unless you have the necessary vehicles.
How To Dig Out The Walkway Yourself
It’s excavation time! Grab your flathead shovel and remove 4″-5″ of sod and dirt within your marks.
Pound it flat with the shovel or tamp it down with a tamping tool, if necessary. You can rent a tamping tool for the day.
After you’ve removed all of the sod, install your steel or plastic edging. This will keep your stones in place, and keep the soil from seeping into your walkway.
How To Cut And Trim The Walkway Stones
There are a couple of schools of thought in order to break the stone to your dimensions.
Trust me, you will have to break a few stones to make them fit. I had some very large pieces that I got 2-3 stones out of simply by intentionally breaking them for a custom fit.
Here are the steps I took to break the stones:
- Gathered Tools: I used a stone chisel
, a 5-lb. sledgehammer, and a claw hammer to do my dirty work. (You can use nothing but a claw hammer to do the job, as seen in the video below.)
- Chose The Stone: Decided what the top side of the stone would be and turned it over.
- Planned The Break: Took the chisel and scribed a line where I wanted it to break.
- Made The Break: Began by pounding the sledgehammer along the line towards the center of the stone. (Work your way outward with increasing blows. Avoid starting on the edges, or you may find yourself with a stone broken in the wrong places!)
- Trimmed The Stone: “Listened” to the stone. Once it broke, I trimmed it up using the edge of the hammerhead.
- Placed Stones: Laid all of my stones out to determine the proper placement.
- Tried The Path: Walked the path a few times at a leisurely gait to place them exactly where I wanted them.
You’ll need to do this as you build the path, as well.
How To Lay Out Your Stone Walkway
- Spread Granite: Spread an even 2″ layer of granite gravel throughout the walkway.
- Make A Slurry: Now load your wheelbarrow with crushed granite stone base and add some water to make a slurry. (Adding water to make the slurry was a trick I learned from Ask This Old House.)
- Start Placement: Working with one rock at a time, carefully place a few shovel loads of the slurry on top of the gravel in approximately the same shape as the rock you intend to place on the gravel.
The slurry allows you to pound the rock “level” with a rubber mallet. This will allow the rock to make contact with the entire underside for a firm base to step upon without tipping.
Add the gravel to just below the top surface of the stepping stones after every couple of stones that are placed. This will lock each rock into position.
TIP: Don’t forget to level the rocks, if desired.
Repeat all of the above steps to complete the walkway.
Spray the entire walkway with a hose to settle all of the gravel and crushed stone.
What I Would Have Done Differently
- Add water to the gravel dust to make a slurry, as mentioned above.
- Use more stepping stones — I had plenty of leftover material remaining.
- Start and finish the project in cooler weather — to avoid the heat and mosquitoes.
Enjoy your flagstone walkway!


