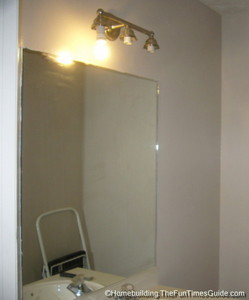
 We live in a house that has a builder-installed, run-of-the-mill mirror in the bathroom. It’s a very plain looking 33-inch x 38-inch mirror that’s been glued to the wall over the sink like a gazillion other homes.
We decided to improve the looks of the mirror and the bathroom. It was long overdue and we’re very pleased with the results.
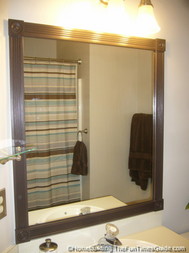
We built and installed a frame around the bathroom mirror. We built it ourselves from scratch. It was easy to do and just a couple of tools were needed to complete the job.
We looked at the mirror frame kits at Lowe’s and weren’t happy with how they looked. We also had an issue on the left side of the mirror because the wall comes in at an angle so there wasn’t enough of a gap for the overlay of the underside of the kits. That’s when we made our way towards the lumber area of the store to look at the finished trim that they have available.
That’s right. A decision made on-the-fly with no concrete plans in hand, just a clear idea of what we wanted it to look like and what it would take to make it happen. We had plenty of paint leftover from the bathroom cabinets that were being renovated, as well.
Are you ready to get started?
Here’s how we did it:
How To Build and Install A Bathroom Mirror Frame
Materials Needed:
These are the materials we used. You may opt to make whatever changes you wish to suit your style.
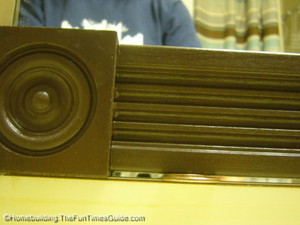
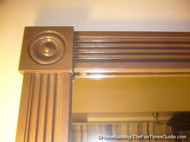
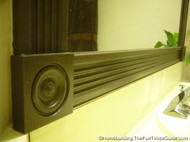
- Two 2-1/4″ x 7′ pieces of fluted casing
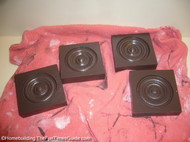
- Four 2-1/2″ square corner blocks – bullseye style
- Cartridge of Liquid Nails-Clear I bought and used Liquid Nails adhesive for mirrors. DON”T BUY THAT KIND!!! If I had to do over again (and I will in the master bathroom) I would use a clear adhesive due to the reflection from the mirror.
- Paint – Your choice of color. We chose the same color as the cabinet.
Tools Needed:
- Miter saw with a fine trim blade installed. I used a 10″ – 60 tooth blade. You could just as easily use a miter box with manual saw if that’s what you have.
- Measuring tape
- Pencil
- 2″ angled paint brush
- 2′ Level (optional); I used the iHandy Level application (free) on my iPod Touch

- Very Fine grit sanding paper
- Painter’s tape (I prefer 3M – #2090 blue)
I tend to be very detailed so be sure and read through all of the instructions before beginning.
- Measure your mirror.
- Buy the materials and gather your tools.
- Paint all sides of the fluted casing and bullseye corner blocks. I didn’t prime any of it because there was such a small amount to paint.
- Sand the rough spots.
- Paint a second coat on all sides of the fluted casing and bullseye corner blocks and let dry.
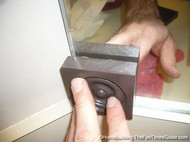
- Apply the adhesive to one of the corner blocks and gently press it into place making sure to overlap the edge of the mirror 1/4″ to hide it behind the frame.
- Apply the adhesive to a second corner block and press it into place across from the first one (width-wise).
Note that the adhesive allows 10-15 minutes working time for precision placement.
- Measure the distance between the two corner blocks and cut the fluted casing to fit. Go ahead and cut another piece the exact same distance for the opposite side of the frame.
- Touch-up any bare wood on the ends with a tiny amount of fresh paint.
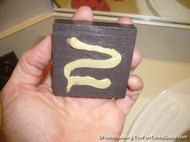
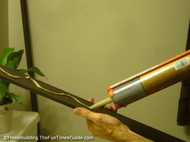
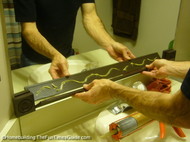
- Apply the adhesive to the reverse side of the casing in an S-pattern for better coverage. Don’t apply the adhesive too close to the sides as it will show in the reflection when applied to the mirror. Trust me on this one.
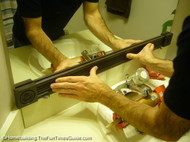
- Press the casing into place between the two corner blocks.
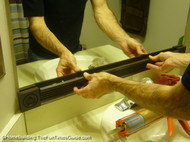
Tip: The casing was 1/4″ shorter than the corner block and I wanted to center it so I placed a dime on top of a quarter (1/8″ when stacked) and placed
them under the casing on both ends (see photos) to ensure that it was level and didn’t shift around as I pressed it in place. You can do what I did or eyeball it and use your level to check it, if you’d prefer.
- Apply adhesive to a third corner block and press it into place.
- Make your measurement between the third corner block and one that is directly below it.
- Make your identical cuts for both lengthwise pieces to make it all square.
- Apply touch-up paint where necessary.
- Apply the adhesive and press the second piece of fluted casing into place (I worked counter-clockwise). I also overlapped the edge of the mirror by approximately 1/8″ to hide the edge.
- Adjust your corner blocks for a flush fit.
- Apply adhesive to the second piece of cross-width casing and press it into place.
- Make your adjustments to the corner blocks once again for a tight fit.
- Finally, repeat the same steps for the fourth corner block and lengthwise piece of fluted casing.
- Make any final adjustments and check it for square, if you’d like.
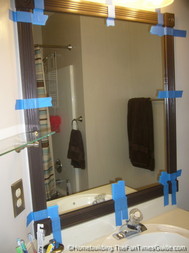
- Use painter’s tape to keep it all in place for a good 24 hours. See the adhesive cartridge for instructions.
- Remove the tape.
- Stand back and admire your work.
You could probably tape the corner blocks into place and make your cuts ahead of time, but the adhesive allows you to make slight maneuvers to your trim pieces for a short period of time so I made my cuts as I worked.
How Long Did It Take and How Much Does It Cost to Do-It-Yourself?
Once the trim pieces were painted and dry, putting the frame together on-the-fly took about 15-20 minutes. The trim and adhesive set us back around $29. The big advantage to making it ourselves was that we got to choose the style of trim pieces that we preferred rather than what came in a kit.
That’s all there is to it!
I started as a home-stalker… visiting brand new homes under construction in the neighborhoods near my house.
That inspired me to write about home building and home renovation projects — chronicling homes during different phases of construction from a consumer’s point-of-view. Basically, the tips you’ll find in my articles are a collection of checklists for what I think should (and should not) go into building or remodeling a quality home.

