We’ve all watched those home repair and makeover shows on television. HGTV immediately comes to mind.
They quickly sink thousands of dollars into remodeling bathrooms, while making it all look effortless. There’s no denying the fact that they’re great at creating luxurious indoor spas from mundane bathrooms — which is all well and good for those building their own version of a dream castle and having a mega budget to do it.
But what about those of us with dark, dreary bathrooms and a meager budget to work with?
I’ll show you how an investment of less than $100 can make a dramatic difference in a small bathroom makeover.
And to top it off, it really doesn’t take much time or effort either.
Here’s how I did it…
Assessing The Situation
Our cabin was previously the equivalent of an all-male deer hunting camp.
All I can say in defense of the bathroom is that it was functional.
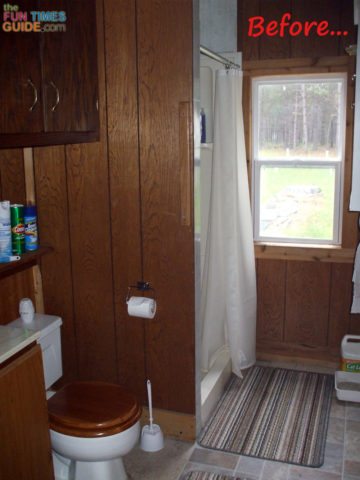
It was a dark, dreary hole that clearly left any female visiting the place with the feeling, “I’m not taking a shower in there.”
The cheap plastic shower stall was old, very yellowed, and even stained as if someone had been cleaning paint brushes there.
Cleansers, heavy scrubbing, even some judicious use of sandpaper barely scratched the surface of the mineral buildup on the walls. You could scrub forever and never be able to return it to the original white. The dark paneled walls did nothing to make the ambiance any better. Overall, it just looked bad.
Small Bathroom Makeover Step 1: Paint The Shower
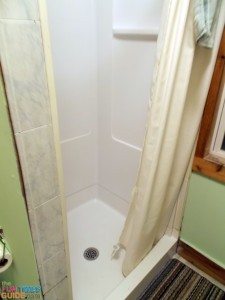 The first step in my budget bathroom remodel was to paint the shower stall.
After masking off the chrome fixtures, spraying a 1-coat application of Rustoleum paint for plastic returned the shower to a crisp, clean pure white.
Wow! The difference that alone made was impressive.
I also tossed the shower curtain in the washer with a good dose of bleach.
Now the shower looks clean and inviting… almost like new!
Cost: $20 for the paint
Small Bathroom Makeover Step 2: Paint The Walls
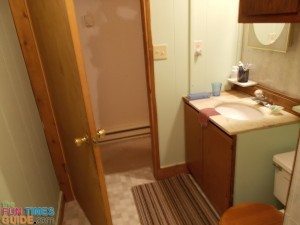 The next step was to address the very dark paneling on the walls.
I applied a quick coat of spring green paint over the wood paneling.
Because it was covering dark paneling, it actually took 2 coats of interior latex paint. But the time invested was only 2 to 3 hours and the change was dramatic.
Cost: $20 for the paint
Small Bathroom Makeover Step 3: Lay New Flooring
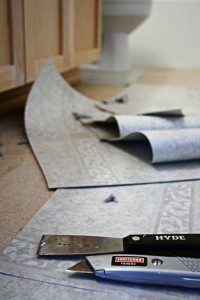 The final step was to address the concrete floor.
I had been concerned about the difficulty level of this flooring project — what with the many different corners and edges involved.
I bought a remnant of vinyl flooring, large enough to give a wall-to-wall floor covering in the bathroom.
Here’s how I completed this project:
- I unrolled the vinyl in the living room on the tile floor and started transferring measurements from the bathroom space onto the new flooring.
- I was concerned about using a razor knife to cut the vinyl, but my fears disappeared when I found the vinyl was easily cut to fit using a standard pair of kitchen scissors. Once cut to approximate dimensions, I laid it in place and did some very minor final trimming with a utility knife. Once everything was looking good, I lifted the edge of the vinyl and applied a bead of silicon caulk to fasten the edge down and prevent curling of the vinyl.
- If you happen to end up with a small gap along the wall where the vinyl doesn’t quite reach, you can always add a ¼ round molding along the baseboard to make everything look perfect.
Cost: $20 for the vinyl flooring remnant
The Finished Bathroom
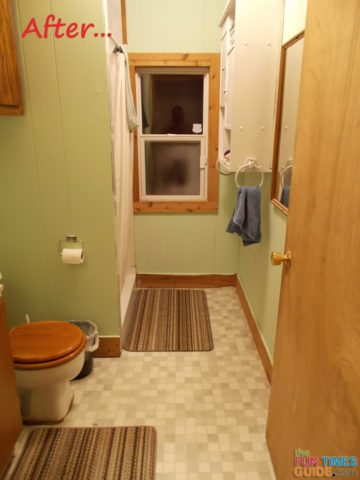
With just 2 days’ labor, I turned a small dark bathroom into a bright and inviting bathroom that anyone would be pleased to use.
No, there’s no Jacuzzi spa. His and hers double sinks wouldn’t fit in this small space anyway.
Nonetheless, we now have a decent bathroom… and sometimes that’s all you’re really looking for.
Other Small Bathroom Makeovers
For added inspiration, here are some budget bathroom remodel ideas that you can do yourself:

