I subscribe to way too many e-newsletters about homebuilding, home fix-it and organization. You name it, it shows up in my email…or so it seems. It’s a love-hate thing. I get tons of great ideas but there are also a lot of ‘throw-aways’ that I dump in the trash. Who has the time? Well, I make time to read most of them and come away a more informed consumer/homeowner for my benefit and yours. Nah…it’s all about me!
One of the newsletters I received recently was about kitchen clutter and ideas to organize your kitchen cabinets. As I’m reading it, I realize…”hey, we’re already doing some of these things here in our little abode”. You see, my better half has terrific organizational skills…or mad skilz! (Ok…so I’m not exactly ‘street’ so I’ll refrain myself from that flavor of linguistic banter.) We have a small kitchen and lots of stuff. Where to put it all? It was time to de-clutter!
Links to more great organization and storage solutions at the bottom of this post.
Blind Corner Cabinet Storage Solutions
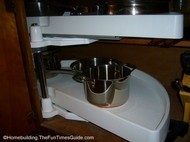
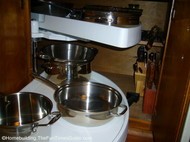
One area that had always been a problem was the blind corner in one part of our kitchen cabinets under the counter. For years it was a pain in the rump to retrieve anything we put in the way back. It was basically a black hole that was designated for seldom used items storage only. At some point we had had enough. We made our way to Home Depot to seek kitchen cabinet storage solutions. We didn’t see anything that fit the bill on the shelves but we did notice a small display with some literature from Rev-A-Shelf that was the perfect solution for the blind corner.
The solution was a half moon, pivot and slide 2-shelf unit from Rev-A-Shelf. We special ordered it (we already had our measurements in hand) and waited a couple of weeks for it to arrive. 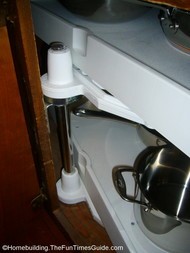 The unit was fairly easy to install and didn’t take very long either. It has been terrific and equally durable. We store all of our larger pots and pans on it as well as a few extras that we don’t have room for on the pot rack. Rev-A-Shelf has a tremendous selection of functional storage solutions that just make darn good sense…so check them out sometime when the Spring cleaning bug strikes.
Vertical Storage Is Best for Cutting Board and Cookie Sheet Organization
One of the other storage solution ideas in the newsletter I read was cookie sheet/cutting board storage. Of course, the preferred method for storing these items is vertical storage so you can pull out any board or sheet with ease. No stacking or unstacking to get at what you want. A secondary reason for vertical storage would be to avoid scratches on any non-stick cookie sheets you may have that could occur from stacking.
Make It Yourself To Save Some Green
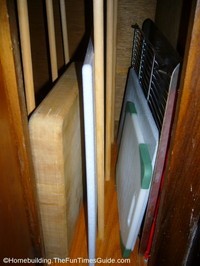 I didn’t buy anything for use in our kitchen cabinet for the vertical storage…I made it. Yes, even with my limited carpentry skills I was able to pull it off. It’s been quite a few years since I completed this project so I’m trusting my memory will serve.
Here’s how I made it myself:
I measured the base of the cabinet where the tray divider would be installed. I went back to the Depot and bought a nice piece of 3/4″ solid oak for my base, matching stain and polyurethane and a couple of 4′ long 1/2″ diameter wooden dowels. I took it all home and re-measured the cabinet base before cutting out the new base of the divider.
Carpenter’s rule: Measure twice…cut once.
I stained the board to match the cabinets and applied the polyurethane. Let dry. I secured the new base on top of the old cabinet ‘floor’ with a few wood screws and glue. Then I used a 1/2″ drill bit and strategically drilled 3 holes down the center of the new base. You can see in the photo that I have 3 dowels to the left, as well. That part of our base cabinets on the left side of the range are open to the other side under the counter. Thus the need to place dowels on the left side to keep everything in place. I measured the height inside the cabinet and cut to length. I put a little glue in the holes and twisted the dowels down in. Give the glue time to dry before placing anything in your new vertical storage unit. That’s it!
Why didn’t I just drill holes in the base of the cabinet instead of installing the 3/4″ oak base? Because I wanted the dowels to hold firm when items were leaning up against them and the deeper the dowels are in the wood, the stronger the holding power.
Lid Storage
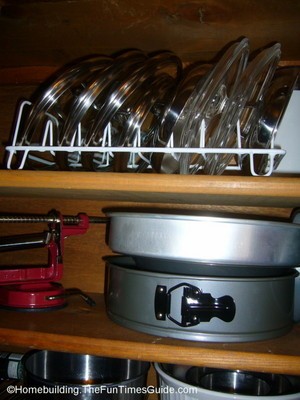 Once again, vertical storage is the way to go for storing all of your lids to your pots and pans. This was very easy. Go to your favorite home improvement store and find a little divided lid rack and make room for it in your cabinet. Nothing could be easier for lid storage.
More Storage Solutions For Your Home
- Spring Cleaning Checklist
- Organize Your Garage
- Rev-A-Shelf: Cabinet Storage Solution Specialists
- Storage Planner: Utilize this excellent Rev-A-Shelf tool to find the best solution product for your storage needs.
- Kitchen Organization Tips from HGTV
Kitchen organization tips I like from HGTV’s Mission Organization:

