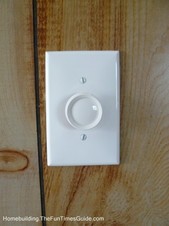
 Installing a dimmer switch to an existing light fixture can allow you to alter the mood of the room with a twist of a knob.
This small home improvement project is not only a great way to update your space, but also to gain some basic electrical know how.
Before beginning any electrical project, be sure to turn off the circuit breaker that services the room you will be working in. That way you won’t have to worry about getting shocked. Also, pick up a new dimmer and some wire nuts at the hardware store so you’ll have everything you’ll need to complete the project. A voltage tester is also a handy thing to have for this and other electrical projects.
Step-By-Step Instructions for Installing a Dimmer Switch
- Begin by removing the faceplate of the existing light switch. With the switch exposed, unscrew the fasteners that hold it into the box.. Then check the connections with your voltage tester to make sure that there is not power in the circuit. If switch is dead, unscrew the wire nuts that connect the wires to the switch. Sometimes there is electrical tape, not wire nuts used to secure the connection.
- Make note of which wires connect to which points on the old light switch. It is often easiest to mark them with tape so you don’t get confused. Paying attention to the location of the wires and how they are joined will ensure that you wire the dimmer switch correctly.
- Take out your new dimmer and attach the wires of the switch to the wires protruding from the electrical box. Be sure to attach all of the wires, including the ground wire using wire nuts. If there is not an existing ground wire, be sure to use a dimmer switch that does not require one. This is usually only a problem in older homes.
- Carefully coil the wires and place the dimmer into the electrical box and screw it into place. Install the faceplate over the new dimmer and screw the knob onto the switch. Turn on the electricity to that area of the house and turn on the dimmer to test your work.
Installing a dimmer switch is a simple job provided you follow appropriate safety precautions and take your time. Although someone with experience should be able to complete this task in about fifteen minutes, plan on spending an hour on the job if this is your first time working with electricity.
I have a lot of hands-on experience in the home construction industry, with a good deal of experience in sustainable building. I’m mostly interested in home restoration and home renovations.


