As with most home remodeling, the bulk of the expense is often the labor.
If you’re like me, waiting until I can afford to hire someone to do a job means it’s probably not going to happen.
For years, fear of botching a remodel kept me from just doing it.
Surprisingly, with ceramic floor tile, if you keep it simple, it’s not that difficult.
Here’s how I installed ceramic floor tile myself…
Ceramic Tile Is Better Than Carpet
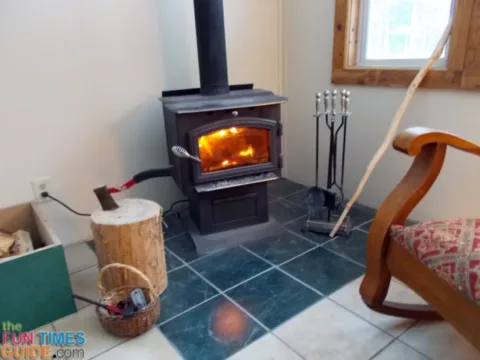
Our cabin had a concrete floor. No matter how often it was swept, it always looked dirty.
Carpeting would have been a fast fix, but leaving the cabin closed up meant that it would collect odors. Also, being a cabin, dirt would be constantly tracked in.
We chose to install ceramic tile because it offers a neat clean appearance. And with a quick pass of a damp mop, it looks spotless and inviting.
With a small budget for this DIY project, we were off to the home center where we picked out our tile.
Choosing The Right Ceramic Floor Tile
Based pretty much on price alone, our first purchase of ceramic tile was indeed inexpensive.
We chose 12” squares that were about 3/16ths of an inch thick.
I laid out one box worth, to see how they looked.
Overnight, while the thin set hardened, about half a dozen of the ceramic tiles cracked. It was then that I read the instructions closer — only to discover these were wall tiles, not designed for use on floors.
Returning 40 some boxes of ceramic tile gets really tiring. Be sure you choose floor grade tiles! They’re at least a quarter inch in thickness.
Where To Start
The professionals will tell you the best point to start from when installing ceramic floor tile is the center point of the room. This can be located by running a chalk line diagonally from apposing corners. The center is where the 2 lines cross.
Because I was on a tight budget, and measurements showed I would have a half-sized tile on one side, I started from one side of the room and worked my way across.
This can get you into trouble — because seldom are rooms square! That small error compounds itself, and you will have spots where tiles don’t line up properly. I didn’t lose much sleep over the matter, as my biggest hope was to have a cleanable surface.
Fortunately, no one else has noticed the boo boos but me.
How To Install Ceramic Tile Flooring
I used a powder thin-set mortar which I mixed with water in a 5-gallon plastic bucket. Using a mixer attachment on my heavy-duty half inch electric drill made quick work of the process. You can buy premixed thinset mortar, but you pay dearly for the convenience.
Next, I spread the thinset with a quarter-inch notched trowel. Only spread enough for 4 to 6 tiles at a time — so it doesn’t set up before you get the ceramic tiles in place.
You can buy little plastic tile spacers that will help you keep your lines and joints straight. They became a nuisance for me, so I just eyeballed it.
Finally, I laid the main field of tiles, and left the edge pieces that required trimming for another day.
The next day, I mixed up the grout (another powder product that only requires adding water) and filled the spaces between the tiles using a rubber trowel. Rubbing in the grout should be done at an angle to the joints, so that it forces the grout into the joint.
Once the grout has set up for about an hour, go back with a clean sponge or rag and wipe the excess off the tiles. It will take 3 to 4 cleanings to remove all the film from the surface of the ceramic tiles.
This was my first attempt at laying ceramic floor tile. Though I’m my own worst critic, I’m satisfied with the results. The floor stays clean, and looks good. Now I only have 3 more rooms to do!
This video shows just how easy it is to lay ceramic floor tile and save those high labor costs:
Tools & Materials Used To Install Ceramic Floor Tile
- Tile saw – about $75 (or you can rent one at your local rental store)
- Quarter inch notched trowel – less than $5
- Rubber trowel – less than $5
- Drill mixer attachment – about $10
- Ceramic tiles, thinset, and grout – approximately $300
I’ve been involved in RVing for 50 years now — including camping, building, repairing, and even selling RVs. I’ve owned, used, and repaired almost every class and style of RV ever made. I do all of my own repair work. My other interests include cooking, living with an aging dog, and dealing with diabetic issues. If you can combine a grease monkey with a computer geek, throw in a touch of information nut and organization freak, combined with a little bit of storyteller, you’ve got a good idea of who I am.


