What’s the best type of garage floor coating to apply to your garage floor?
Well, you need to know a few things about your garage floor before you can begin to decide on the type of garage floor coating that’s best suited for you.
First and foremost, you can’t apply any type of paint or epoxy coating to your garage floor until at least 28+ days have passed since it was poured.
It must be fully cured concrete if you are to have a shot at a successful coating application that won’t bubble up or peel. There are other factors that come into play, as well.
However, you can apply a colorant to newly poured concrete!
Here’s a little about the differences between stains for fresh concrete and concrete coatings for older concrete floors…
How To Color Fresh Concrete
There are a few different ways to color concrete that is freshly poured or about to be poured:
Concrete stains are far different from concrete coatings, but they have the same basic results.
One significant difference that the color hardeners have versus concrete paint is that the moisture from the freshly poured concrete seeps into the powder, activates the powder, and monolithically bonds with the concrete. This can increase the surface strength of the concrete from a typical strength of 3,000 to 4,000 PSI to a surface strength of 7,500 PSI.
How To Color Aged Concrete
Personally, I wanted to know the different types of garage floor coatings and what type of coating is best suited for residential use — because I was eager to paint my own garage floor.
After all of my research, it turned out that applying an epoxy coating on my garage floor was the best option.
Here’s how…
First, you need to see if your garage floor will accept and hold an epoxy coating, using these 3 steps:
- Tape a plastic garbage bag to a portion of the garage floor and leave it for 24 hours.
- After a day has passed, remove the garbage bag.
- If the concrete looks wet or moist, do not apply an epoxy coating because the water pressure from below will break the bond.
Simple enough.
Now, if you want to proceed with an epoxy garage floor coating, it’s time to get out the cleaning supplies and begin the prep work.
#1 – Be sure that you open the garage door for proper ventilation.
#2 – Tape off the lower walls, thresholds, and doors.
#3 – Clean and rinse the garage floor thoroughly. Here’s how:
- Start out by cleaning and degreasing the floor. Use a 3-to-1 water-to-bleach mixture and scrub with a stiff bristle brush. (Don’t forget your protective wear.)
- Rinse the floor thoroughly.
- Remove all of the oil spots.
- Etch it with a mild acid.
- Rinse the floor thoroughly!
- Let it dry overnight.
#4 – Repair any cracks. Here’s how:
- Brush the dirt and debris out of the cracks and holes.
- Use a concrete/mortar repair compound to fill small cracks
- Use concrete patch for larger cracks and holes.
- Let that set for a few hours. (Refer to the directions on the product label.)
#5 – Apply the epoxy coating. Here’s how:
- Open both cans of the primary epoxy components: paint and hardener.
- Stir the paint and slowly pour the hardener into the paint. Stir for 3 minutes until well blended.
- Set the mixture to the side for 30 minutes out of the sunlight.
- After 30 minutes have elapsed, grab a 3-inch paint brush and start cutting in around the edges. You have about 2 hours to use that particular mixture, so be swift.
- Once the edges are done, pour the epoxy mixture into a paint tray, and use a 3/8″ nap roller to finish the remainder of the garage floor.
- Paint in 10-by-10 foot sections and have an exit strategy.
- Keep a wet edge as you move along.
- Have your color flakes (from the epoxy garage floor kit) handy in a can so that you can toss them on the section that you just finished painting. Practice tossing the flakes on a tarp or newspapers before you begin to make sure you’ve got the hang of it.
#6 – If you plan on applying a second coat, allow the epoxy coating to dry 12 to 24 hours — depending on the temperature and humidity level. Follow the manufacturer’s directions on the can.
#7 – After you’ve finished painting the epoxy coating, give it a full day to dry thoroughly.
#8 – Apply the top coat. Here’s how:
- Pour the hardener into the can of top coat.
- Stir for approximately 3 minutes until it is blended well.
- Set the can aside for about 30 minutes out of the sunlight.
- When you’re ready to apply the top coat, stir it again for about a minute.
- Add your anti-skid granules now, if desired.
- After 30 minutes have elapsed, grab a NEW 3-inch paint brush and start cutting in around the edges. You have about 2 hours to use this top coat mixture, so work quickly.
- Once the edges are done, pour the mixture into a NEW paint tray, and use a NEW 3/8″ nap roller to finish the remainder of the garage floor.
- Paint in 10-by-10 foot sections and have an exit strategy.
- Keep a wet edge as you move along.
#9 – Let it dry a day or 2 before you walk on it, and give it 3 to 4 days before you park a car on it.
The Finished Product
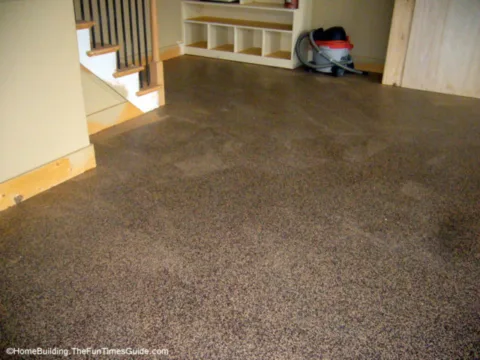
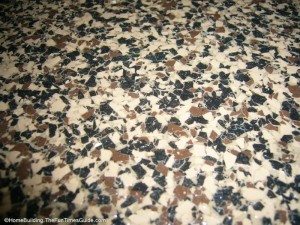
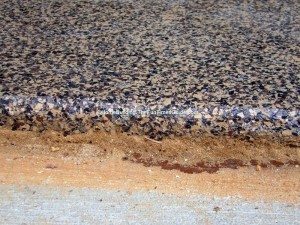
Here are close-up photos of my garage floor after I was done:
This DIY garage floor coating tutorial from This Old House summarizes most of the steps that I used.
Watch highlights from each of the main steps in these 2 videos from Quikrete.
First, doing the prep work…
And finally, applying the coating…

