Painted wood floors are one of those things where you either love ’em or hate ’em!
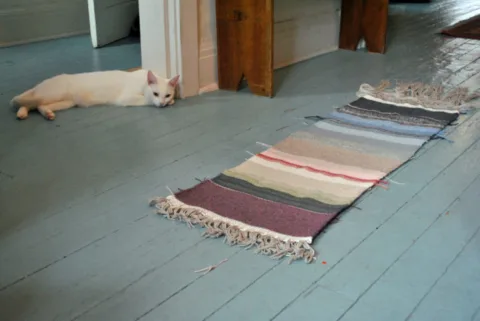
When it’s done right, I love ’em. It creates interest and has the potential to make people say “Wow!” when they walk into the room.
But why would anyone choose to have painted wood floors instead of beautifully stained hardwood floors?
Here’s why…
Reasons To Paint Wood Floors
Well, to be honest, if you have beautifully stained hardwood floors, you’re not going to choose to paint them unless you’ve gone mad!
But, there are several really great reasons to paint wood floors:
- If your hardwood floors are in poor condition and painting them would be a huge improvement over their current condition.
- They’re less expensive to do than refinishing hardwood floors.
- To create a particular design or style in your home and painted wood floors naturally lends itself to that task.
- It helps defines spaces in a home. Painting a border or design in a sitting area in a master bedroom is a great example of defining a space within a room.
- To create a totally unique look that will make a statement.
- It’s cheaper than sanding and refinishing a hardwood floor. (I know I said that already but it bears repeating because that is why most people will end up with painted wood floors.)
You’re probably looking for a little how-to advice before you paint your wood floors yourself. There are just a few things to remember…
Prep Work Is Key
The prep work depends on the type of finish that’s currently on your wood floor.
If you are painting over an already painted floor or a floor with a polyurethane finish, first remove any loose or cracked paint and scuff sand the floor using a medium grit garnet paper to remove any glossy areas. Then thoroughly wash the floor and vacuum up any loose particles.
Mop the floor with:
- All-purpose wood floor cleaner
in rooms other than the bathroom or kitchen
- 2 cups of vinegar to a gallon of hot water to cut through the grease and grime — for the kitchen and bathroom
Be sure to rinse the floor thoroughly by emptying the mop bucket and filling it with clean hot water. You may have to dump it a couple of times, depending on the condition of your floor. Let it dry thoroughly before you begin to paint the floor.
You should also feather sand the edges to allow for the paint to thoroughly adhere to the end surfaces.
If you are painting a bare wood floor, then it will need to be cleaned, sanded, and vacuumed before you start priming and painting.
Here’s how to clean a bare wood floor:
- Dull any glossy areas of the floor with medium grit (#120) garnet paper
.
- Use wood filler where necessary.
- Sand smooth and vacuum the floor.
How To Remove Mildew From The Floor
If you happen to have mildew on your floor, do this to remove the mildew first:
- Put on rubber gloves and goggles — maybe even a dust mask, so you’re not breathing in any of the chemical fumes.
- Mix 3 parts water to 1 part household bleach.
- Mop that mixture onto the floor and let stand for 20 minutes. (Make sure that it stays wet with the bleach mixture until the 20 minutes are up!)
- Rinse thoroughly, and let dry completely.
How To Prime The Floor
- If you’re going to paint the floor with a latex paint, use either a latex primer
or an oil-based primer.
- If you’re going to paint the floor with an oil-based or polyurethane paint, use an oil-based primer
.
In either case, be sure to use a primer recommended for interior floor use.
How To Paint A Wood Floor
Here’s how to decide which type of paint to use:
- For a satin finish, use a latex floor paint.
- For a semi-gloss or gloss finish, use a latex, alkyd or polyurethane paint
Consult a trusted paint store professional for the best results. Be sure to use paint recommended for floor use. Wall paint won’t cut it.
Here’s how to do it:
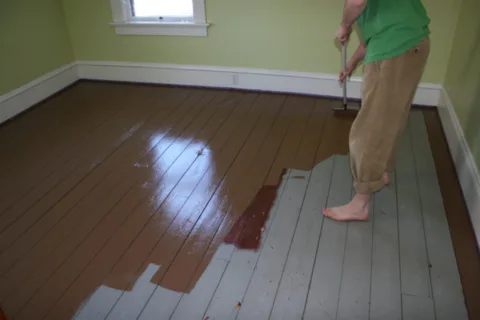
- Use a brush to cut in the edges.
- Use a ¼” nap roller with a long handle to fill in. The long handle will save your back and your knees.
- Apply at least 2 coats of paint and allow 24 hours in between coats.
- Finish it up with a couple of coats of polyurethane to make it durable.
- Let it cure for a couple of days before you begin to replace your furniture on it. The last thing you want to do after all of your hard work is to rush the curing process. It should not be tacky. I suggest you keep your home at 70 degrees Farhenheit or higher.
What About Painting A Cool Design Or Effect?
Not content with a solid coat of paint?
You might want to consider some cool design ideas…
But before you get started, you should consider the following:
- One solid color will give you a more contemporary look.
- Painting a border on your wood floor is more traditional.
- Creating diamonds or a checkerboard leans towards a country style.
- Stenciling could be just about any style depending on the design. Think about your style of home before proceeding.
Here are some great painted wood floor design ideas:
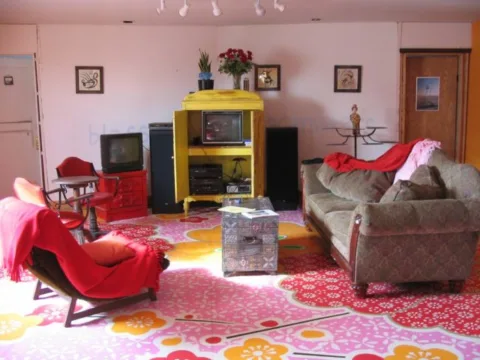
- Decorative Colors, Designs, Shapes, And Patterns
- Painted Wood Floors And Geometric Designs
- Wood Floor Stenciling Ideas
- Stenciling Hardwood
- Video: How To Paint A Checkered Floor
- How To Paint A Diamond Design

