 While larger masonry projects are often reserved for the professional, smaller projects, such as replacing a few damaged bricks, can be tackled by the ambitious homeowner.
Just keep in mind that any project that involves a structural element or chimney flue should be completed by the professional mason.
Match Your Existing Bricks and Save Leftover Bricks for Future Replacement Needs
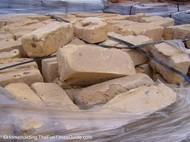
Before attempting to replace damaged brick, it is important to locate brick that will match the existing structure. If the area you are repairing is comparatively new bricks are often saved for repairs, but older structures may require that you call salvage yards to find appropriate replacements.
Use the Correct Type of Mortar
You will also have to consider the mortar you must use to make the repair. There are five types of mortar commonly used in residential construction, considering that you will not be working on a load bearing structure Type N is often appropriate. You may have to add dye to the mortar as well to create as accurate a match as possible with the surrounding joints.
Replacement Bricks In Hand? Let’s Get Started
When you have located the appropriate replacements for your damaged bricks, you can then start on the repair. Begin by chipping out the damaged brick as well as the surrounding mortar using a cold chisel and a ball peen hammer. This can be tricky and tedious work for the amateur, but it is important to work slowly to avoid accidentally damaging nearby bricks.
- After the bricks and mortar are removed, use a brush to remove any debris.
- Wet the area where the new mortar is to be applied thoroughly: this step will help your mortar cure properly.
- Once you have mixed a batch of mortar according to the manufacturer’s instructions, use a trowel to butter the bottom of the hole where the damaged bricks once were.
- Then butter the top and sides of your first brick and set it into place.
Be sure to apply enough mortar so that the joint are the same thickness as the surrounding area. Keep in mind that some mortar protruding from the joint is natural and will be addressed in later steps.
- Working carefully yet quickly, continue laying bricks until the hole is filled.
- Check all of the mortar joints: if certain areas of the joints appear to be concave apply a bit more mortar.
- Next, shape the joints using your trowel or a jointer so it mimics the surrounding joints.
- Brush any excess mortar crumbles away from the face of the brick and joints.
Although replacing a few damaged bricks is a fine weekend project for many homeowners, keep in mind that larger projects probably merit calling a professional. This is also an essential step if you have any doubts about the structural stability of the area you wish to repair.
I have a lot of hands-on experience in the home construction industry, with a good deal of experience in sustainable building. I’m mostly interested in home restoration and home renovations.
