I’m in the process of sprucing up the back deck of my house. It’s got 21 years worth of wear on it, but it’s in really good shape.
I’ve cleaned and sealed it several times over the life of the deck, so far — and now it’s time to do it again.

I’m going to make one change to the process this time, though. This year, we are going to try a deck stain to hide some of the wear and tear while lending a little bit of color to the property.
I’m going to share with you:
- How to choose a deck stain color.
- How to choose the finish/opacity
- How to prep the deck and clean it before you stain.
How To Choose A Deck Stain Color
I’ve always used a transparent water repellent deck stain in the past
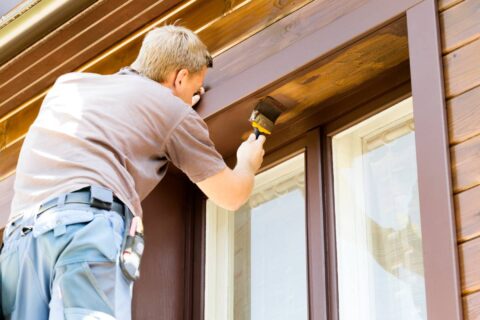
We’ll be painting the house soon — so coordinating a deck stain with the new house color will be a big factor in the decision-making process this time.
Time to get out the color wheel — so I can be sure to match the hues!
So think about the color you want (red, green, brown, or whatever). Then consider different shades of that color.
Take some samples home and try them out on areas of your deck that won’t be obvious to everyone else.
Once you’ve got the tone, tint, or shade of the color you’ve chosen, it’s time to figure out which sheen best suits your needs.
TIP: Be sure to choose a stain or water repellent that contains UV inhibitors!
Here is a short video with some tips for choosing lighter vs. darker deck stain colors and deciding between an oil-based stain vs. latex stain:
How To Choose A Deck Stain Finish / Opacity
When it comes to the deck finish, most decks look best with a flat sheen — but your situation may be different.
TIP: Did you know that you can purchase penetrating deck finishes that contain insecticides? I’m not sure if that’s good or bad. Wear sandals — that’s all I’m saying.
Here are a few other things to keep in mind when choosing a deck stain finish:
- Skip the lacquer and varnish. They don’t hold up very well under sun and rain.
- It’s helpful to know how durable the finish is and ease of application. (For example, water repellents are easiest to apply, then stains, and finally paints take the most effort.)
- As always, look for products with low VOC’s (Volatile Organic Compounds) whenever possible. (Low VOC’s = reduced air pollutants.)
There are basically 4 deck stain opacities:
- Clear (or natural) Deck Stain – Clear highlights the true colors of the wood and allows you to see all of the wood grain. Using a clear deck stain (or a water repellent) is a great choice if you’re protecting Ipe, cedar, redwood, or teak. These types of woods are more expensive than pine, for example. Clear finish protectants allow the wood grain to weather a natural gray or whatever tone comes natural. Re-apply every couple of years.
- Tinted Deck Stain – A tinted stain gives minimal change in color (compared to the natural wood color). If you’ve never stained your deck before, you might want to consider a tinted stain — because it’s very subtle and hard to mess up when you’re applying it. Accidentally doubling up on the same section of a board will be hardly noticeable. Re-apply every 2 to 3 years.
- Semitransparent Deck Stain – This type of stain has heavier doses of pigmentation added to it, but the wood grain still shows through. These hues of deck stains are recommended for older decks that have had a few boards replaced along the way. The depth of hue will make all of the boards seem more uniform. Re-apply every 3 to 5 years.
- Solid Deck Stain – Recommended for older decks to hide imperfections, slightly damaged areas, wear and tear. Wood grain will not show through with solid deck stains. The wood grain texture will be visible and will have all of the divots, but streaks from the pressure washer will be covered. Re-apply every 5 years.
How To Prepare Your Deck Before Staining It
Olympic Paints & Stains has some great tips for determining if your deck is ready to be stained by performing a water absorption test:
- Pour a cup of water on your deck.
- If the wood soaks it up within 10 minutes or if the surface color darkens, it will absorb a protectant.
- You want the deck stain to penetrate the wood for proper protection.
Or, if your deck has been previously coated with a solid color stain, you can do a tape peel test:
- Take a putty knife and mark an “X” in 3 to 4 random areas on your deck.
- Make your marks without cutting into the wood.
- Cover an “X” with duct tape and press down firmly.
- Quickly remove the duct tape.
- If any wood flakes or color stain sticks to the tape, the deck needs to be stripped prior to being stained again.
This video shows you how to strip a deck:
How To Clean Your Deck Before Staining It
You’ll also need to clean your deck to remove all dirt, mold, and mildew. Otherwise, all of your hard work applying the new stain will be for nothing — not to mention the time and expense you put into it.
I recommend using a pressure washer and a deck cleaner
TIP: If you have a redwood or cedar deck, consider using a deck brightener rather than a cleanser. It’s less harsh and lets the beauty of the grain come through. Cedar and redwood are softer woods that require a little bit of extra TLC.
This video shows you how to clean a deck:
How To Stain A Deck
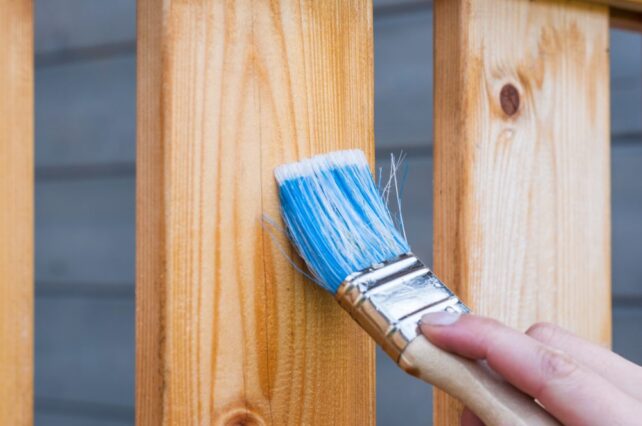
These next 3 videos show various techniques you can use to apply a deck stain.
You can use a paint roller:
You can use a paint sprayer:
TIP: I think an airless paint sprayer and a 9-inch painting pad are the easiest ways to stain a deck
Well, that’s basically all there is to it. As with many things of this nature, the prep work is just as important as the application process.
Good luck with your deck staining project!
Must read: 5 DIY Outdoor Home Improvement Projects You Can Do Yourself
More Tips For Staining Your Deck
In addition to the links I’ve included above, I found these really helpful as well when I was choosing a deck stain, figuring out how to prep my deck for staining, and ultimately staining the deck myself:
- What You Need To Know About Composite Decks
- Tips For Dressing Up A Deck
- Better Homes & Gardens: Deck Designs & Ideas
I started as a home-stalker… visiting brand new homes under construction in the neighborhoods near my house. That inspired me to write about home building and home renovation projects — chronicling homes during different phases of construction from a consumer's point-of-view. Basically, the tips you'll find in my articles are a collection of checklists for what I think should (and should not) go into building or remodeling a quality home.